
An iconic sound in many electronic music genres, the Reese bass is instantly recognisable thanks to its characteristic menacing throb and weighty low-end. So what is a Reese bass, and how does one make a Reese bass from scratch?
In this tutorial we’ll make a Reese bass from scratch with Native Instruments’ Massive X synth, and look at how it can be processed with Guitar Rig 7 Pro. Both of these are included in the 360 Plus free trial.
Get both in free trial
Jump to these sections:
What is a Reese bass?
A Reese bass is a legato synth bass tone that pulsates and rumbles in a sinister fashion. You can make a reese bass with any synth with two sawtooth oscillators and a low-pass filter. You can hear Reese basses in jungle, drum ‘n’ bass, hardcore, garage and dubstep music.
The original source of the Reese bass is 1988’s “Just Want Another Chance” by Reese, a pseudonym of Detroit techno pioneer Kevin Saunderson.
According to Saunderson this bass was created with a Casio CZ series synth, and you can hear it play unaccompanied at the start of the version of “Just Want Another Chance” linked above.
In 1994 jungle legend Ray Keith’s released “Terrorist” under his Renegade pseudonym. This track was based around a sample of the “Just Want Another Chance” bass, taking a single note and turning it into a whole new bass line.
The sampled Reese bass was a sensation in the nascent jungle scene, as up to this point jungle bass lines were typically pure sine tones without harmonics above the fundamental, for instance sine subs and 808 basses. The Reese bass features harmonics above the fundamental, which gives the bass a bigger, fuller sound, and the rumbling movement of these harmonics give the sound a sinister feel all of its own.
Other famous jungle tracks that sample the Reese bass include Remarc’s “R.I.P. (DJ Hype Remix)” and Ed Rush’s “The Force Is Electric (Remix).”
You can hear in “The Force is Electric (Remix)” the Reese bass is slightly distorted to bring out its mid-range frequencies, and as drum ‘n’ bass evolved from jungle, the term “Reese” began to be applied to any legato bass sound with rich harmonics. Examples of more mid-range rich Reeses can be heard in DJ Trace’s “Mutant Revisited” and Boymerang’s “Still.”
In the mid to late-90s the early UK garage sound took much inspiration from jungle, including its palette of bass sounds. You can hear the original Reese bass in UK garage tracks such as 187 Lockdown’s “Kung-Fu” and Dubstar – “I Will Be Your Girlfriend (Sol Brothers Brokout Dub).”
Reeses basses can also be heard in other styles of bass-heavy music such as dubstep, notably in Skream’s remix of La Roux’s “In For The Kill” and Burial’s “South London Boroughs.”
How to create the Reese bass sound
1. Detune sawtooth oscillators
Load up Massive X on a MIDI track in your DAW. The default patch features a single sawtooth oscillator.
Native Instruments · 01 Single sawtooth oscillator
To introduce the second oscillator, turn up the vertical fader to its left.
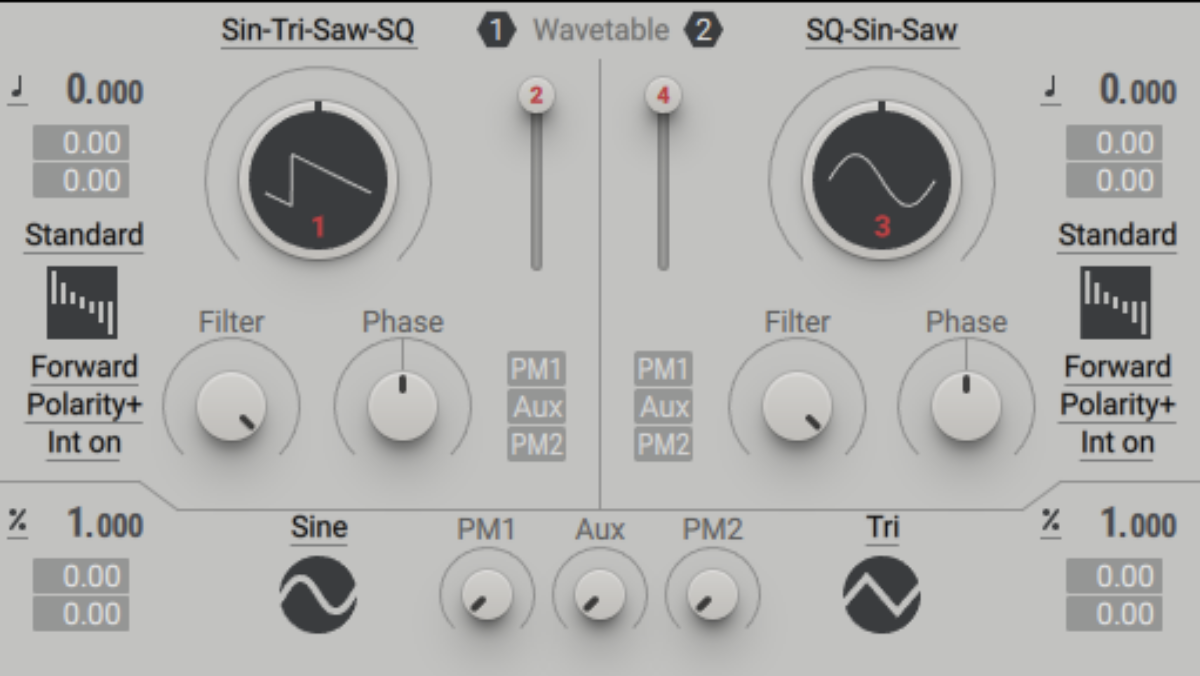
Turning up the second oscillator
Click the oscillator wavetable name to select a new wavetable. Select Sin-Tri-Saw-SQ.
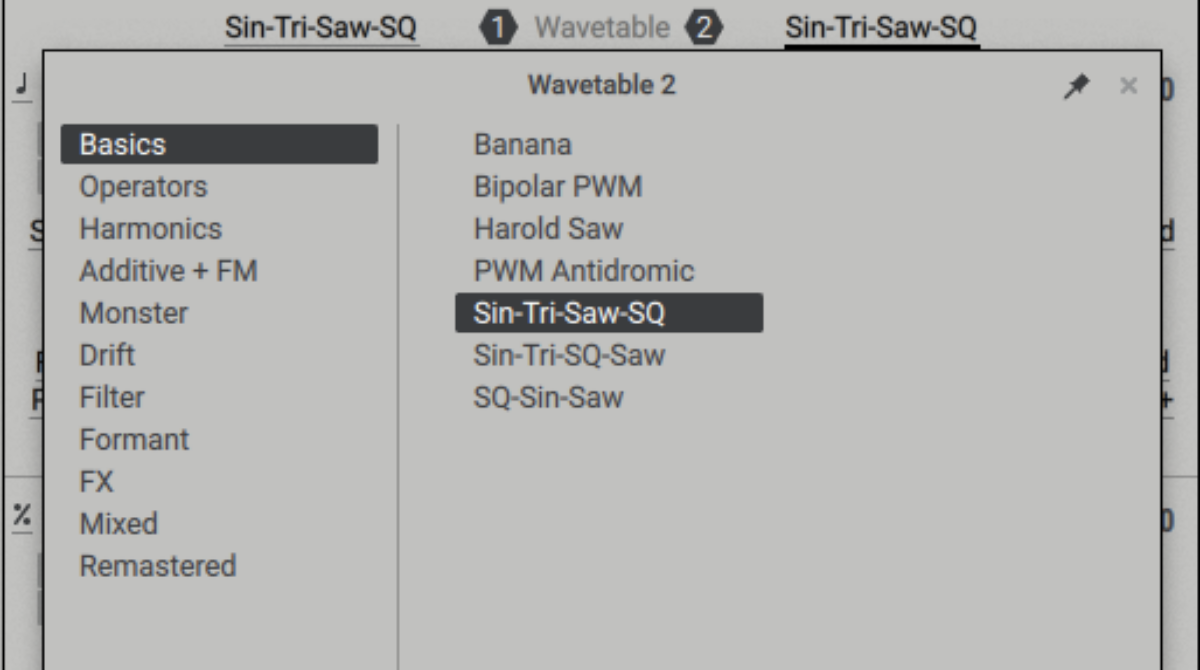
Selecting a new wavetable
Now both oscillators are set to the same wavetable and both their Wavetable Position knobs are set to 12 o’clock, they’ll output the same tone.
Native Instruments · 02 Dual sawtooth oscillators
Now, let’s detune these oscillators, which will cause them to “beat” against each other, creating the rich, pulsating harmonics that form the basis of the Reese sound. Set Oscillator 1’s turning to +0.300 and Oscillator 2’s turning to -0.300 semitones.
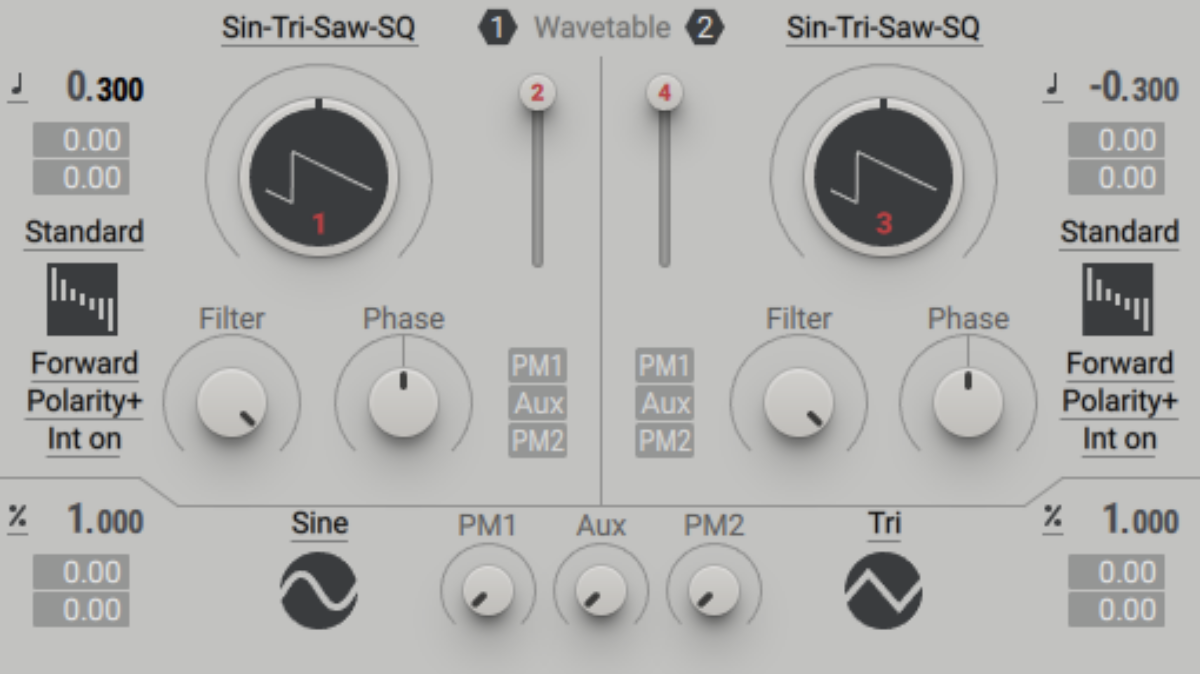
Detuning the oscillators
This gives us a rough, unfiltered Reese, much like DJ Trace’s “Mutant Revisisted.”
Native Instruments · 03 Detuned sawtooth oscillators
2. Add a low-pass filter
To get that smooth jungle Reese sound, we need to apply some low-pass filtering. In the Filter panel, set the Freq (filter cutoff frequency) to around 650 Hz, and the Res (Resonance) to around 14%.
This gives us that smoothed-out jungle sound.

Low-pass filtering
Native Instruments · 04 Filtered sawtooth oscillators
Before we move on, let’s make this patch monophonic so that we can only play a single note at a time. Click the Voice panel, and set the Polyphony to Mono.
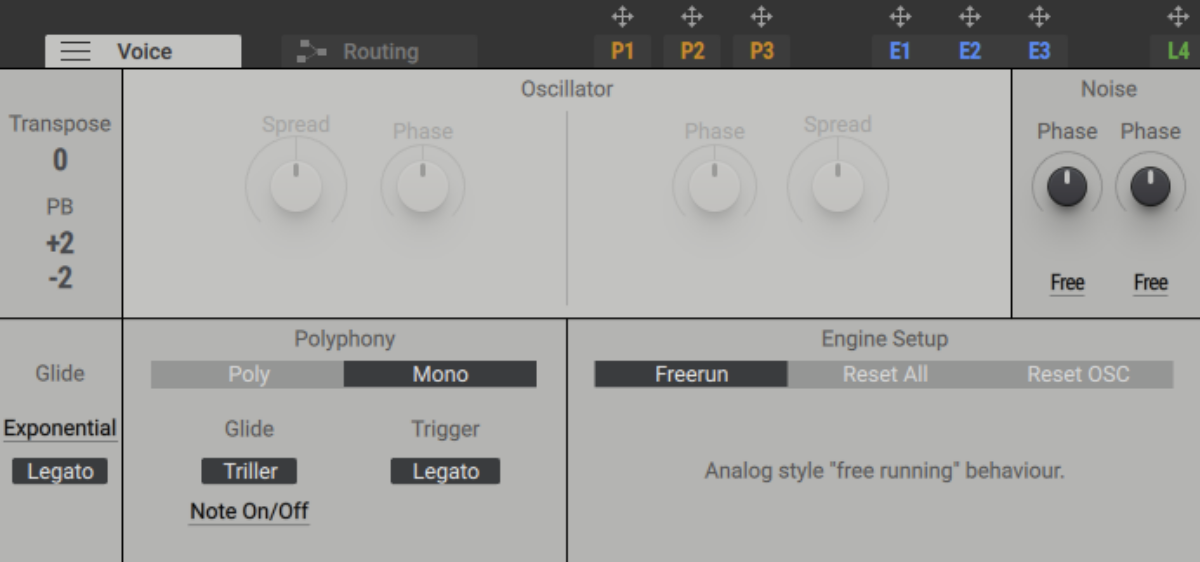
Setting Polyphony to Mono
3. Customise the sound
Earlier we detuned the oscillators to +0.300 and -0.300 semitones. This is what gives the sound its pulsating, rumbling quality. We can adjust the tuning now to make this rumble more dramatic, or more subtle.
For example, if we set the oscillator turnings to +0.150 and -0.150 we get a more mellow sound with slower beating.
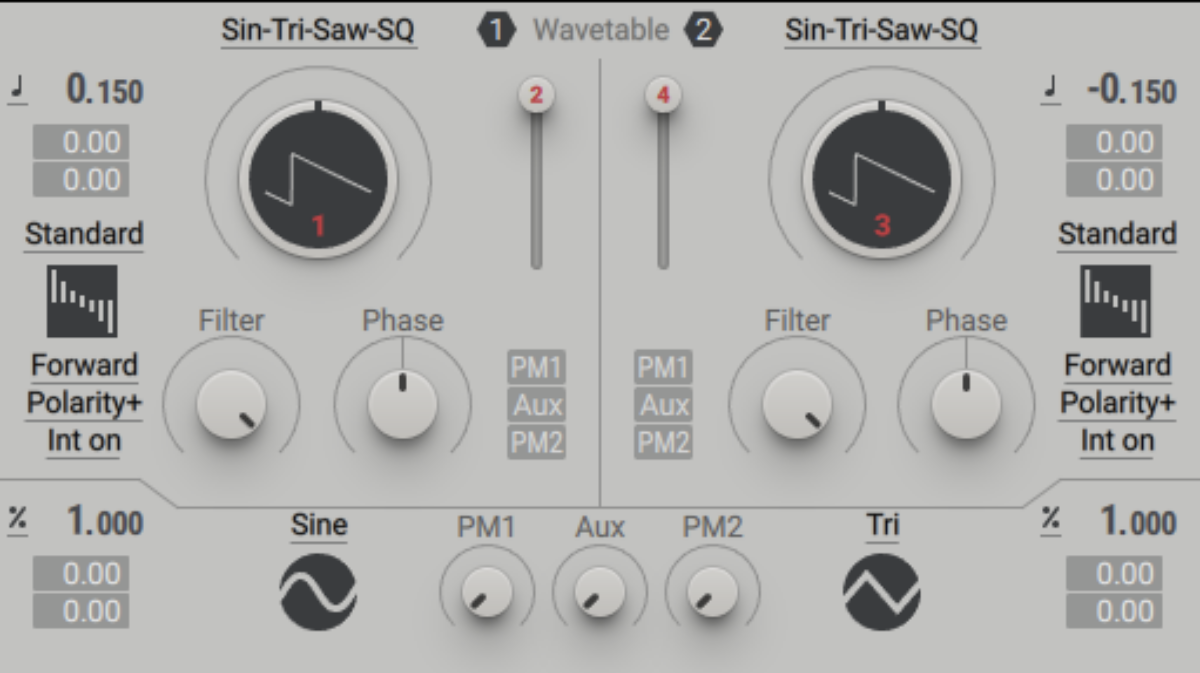
Reducing the amount of detune
Native Instruments · 05 Reduced detune Reese
Return the turning to +0.300 and -0.300. Now, let’s try something more dramatic. Add Guitar Rig 7 Pro to the Massive X track, and double-click the Rock Seeker preset to load it up.
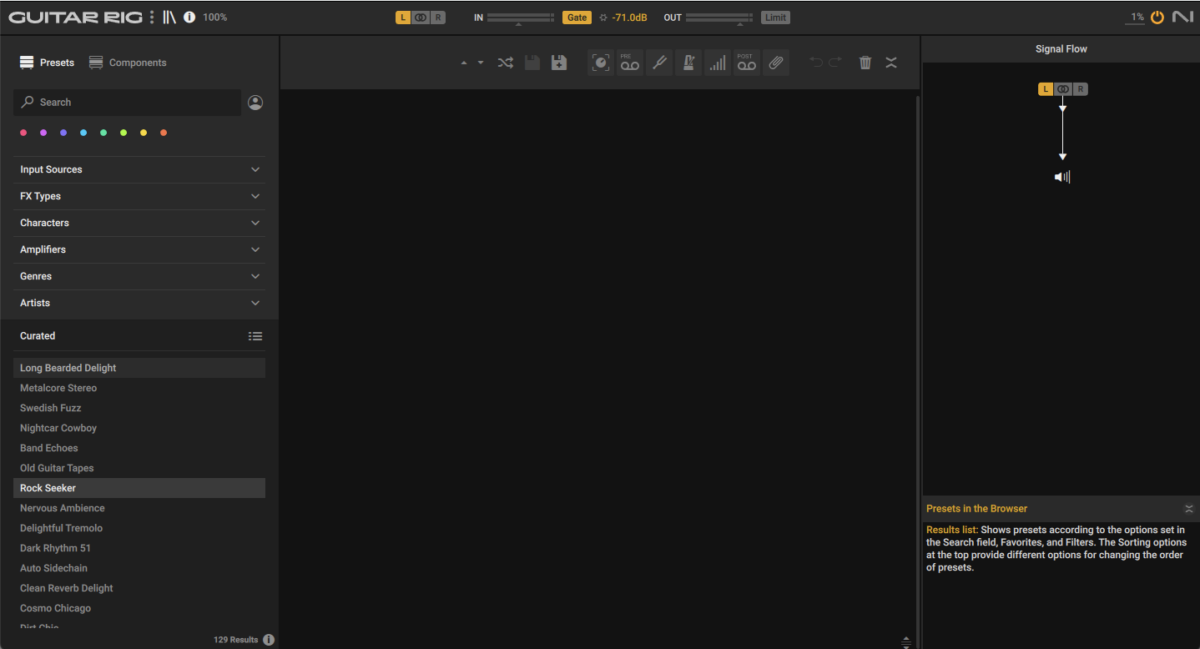
Loading the Rock Seeker preset
This gives us an overdriven Reese tone much like Boymerang’s “Still.”
Native Instruments · 06 Overdriven Reese
A popular way to process the overdriven Reese sound is to apply a sweeping notch filter, which adds another dimension of movement to the sound. Add your DAW’s stock filter plugin after Guitar Rig 7 Pro, and set it to Notch mode.
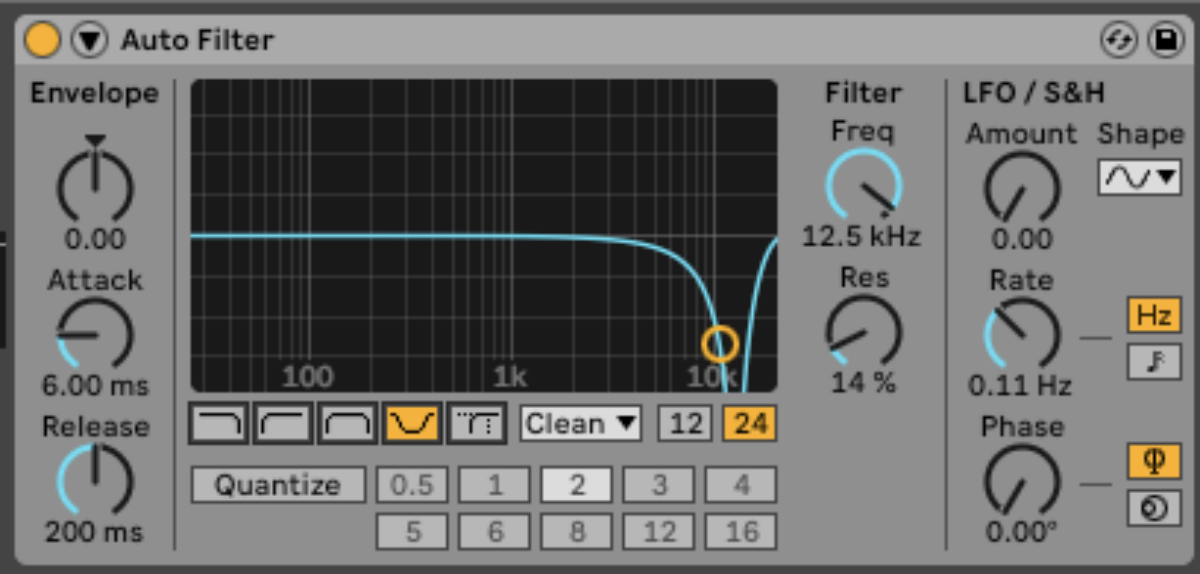
Adding a notch filter
Now, automate the filter cutoff frequency so that it sweeps up and down at the Reese plays.

Automatic the notch filter
This gives the Reese a sinister evolving fee, the intensity of which can be adjusted with the filter’s Resonance control.
Start using Reese bass in your music today
In this tutorial we’ve shown you how to make a Reese bass from scratch with Massive X and Guitar Rig 7 Pro.
If you’d like to learn more about sound design, check out How to program your first sounds with Massive X, Sound design 101: How to make sounds and Sound synthesis 101.
Make your Reese bass with free trial
The post How to create the signature Reese bass sound first appeared on Native Instruments Blog.